How to Create a Modern Coding Blog with Continuous Deployment using Gatsby, Github, and Netlify CDN
— Tutorial, Jamstack, Gatsby, Continuous Deployment, Coding Blog — 12 min read
I'm Brett Fullam, a creative technologist turned networking and cybersecurity specialist passionate about security automation. In this blog post I'm going to show you how I created a modern jamstack-based coding blog that's lightning fast, secure, SEO-ready, and leverages automatic site builds via continuous deployment.
Hello Continuous Deployment!
Continuous deployment allows you to leverage automation to update your site's content automatically by removing the tedious task of manually migrating updated content to the web server hosting your site. Every time you push updated blog or site content to your Git provider (in this case I'm using Github), a "build" is triggered automatically and your site is re-deployed with the updated content. It's dead simple.
For this to happen we need to use a hosting provider that offers this service. I'm sure there are others out there, but I prefer to use Netlify for hosting sites with continuous deployment.
In Netlify, you link a GitHub, GitLab, or Bitbucket repository to a site defined in the Netlify dashboard. Each time you push to your Git provider, Netlify detects a change has been made in your repository and triggers a build that deploys the updated site content to their content delivery network (CDN).
Did I mention that you can do this for FREE?
Well, almost free. The only cost related item in this project was a custom domain name. The development tools, Github and Netlify accounts are all free. You can actually build and deploy your blog before you even have a custom domain. The process of adding a custom domain to an existing site in Netlify is quite simple, and they help you enable automatic TLS certificates with Let’s Encrypt too. Can't say enough good things about them.
Now, while you could create a blog without a custom domain name, I wouldn't recommend going that route. It's not professional, and in the long run it could impact your site's SEO.
Now that we have that out of the way. Let's get to it!
Introducing the Jamstack
For those of you who aren't familiar with Jamstack-based websites, the Jamstack "is an architecture designed to make the web faster, more secure, and easier to scale", Jamstack.org.
You should definitely head on over to the Jamstack website for more detailed information on the available site generators, headless CMS options as well as best practices. I chose Gatsby to build my coding blog, but there are plenty of alternatives to choose from.
Enter Gatsby
In this tutorial we'll be using the Gatsby static site generator to build our blog, and while the option is available we will NOT be using a headless CMS for this blog. It's much simpler to work with an IDE of your choice (in my case VScode), and a copy of the site in our local development environment.
Why Gatsby? In a single word. Speed. Gatsby had caught my attention back in 2017 when I was looking for a React-based framework to build ultra performant websites for my clients. Gatsby more than delivers. Sites built with Gatsby feel like native applications on mobile devices, and with a few extra lines of code you can turn your site into a Progressive Web App (PWA).
Advantages of choosing a starter theme
I think it's safe to assume that most bloggers aren't seasoned web developers, and many are leveraging some sort of starter theme for their blogs. Believe it or not, working with a starter theme that's packed with features to enhance performance, SEO and security is exactly what you should do. Leave the web development headaches to the professionals and focus on what's more important to you ... like your blog content. So, a pre-built starter theme is an excellent choice.
Gatsby starter themes
Now, let's head on over to the Gatsby site and download our starter theme. I recommend saving this to your desktop for now. We'll be moving the contents of the downloaded theme into our Github folder in just a minute.
The starter theme I selected to build my coding blog is called "gatsby-starter-minimal-blog" which uses "markdown" to create blog posts and leverages a simple folder structure to manage them. For those of you new to markdown you can use an online markdown editor like Dillinger to help you create your markdown files.
However, you certainly can choose another starter theme to work with if you prefer. There are plenty to choose from here on the Gatsby Starter Library page, and you can still customize it to make it "yours" using a process known as "file shadowing". You'll need to do some minor web development here, but it's relatively straight forward even for someone with little to no experience. You can find detailed Gatsby-related file shadowing information on the Themes page of their documentation.
Once you've selected a starter theme to work with, locate the "source" link under the starter theme's name to download the theme code directly from the author's github repository. If you've never done this, once you're on the theme's github page look for the "code" button, click it once and look for the "Download zip" option. To keep things simple, make sure you download this to your desktop. Once it's downloaded, unzip it to access its contents.
Github
If you don't already have a Github account, you'll want to set this up first. Head on over to Github.com and sign up for a FREE account. Free Github accounts now allow for both public and private repositories (private repositories was formerly a paid feature only).
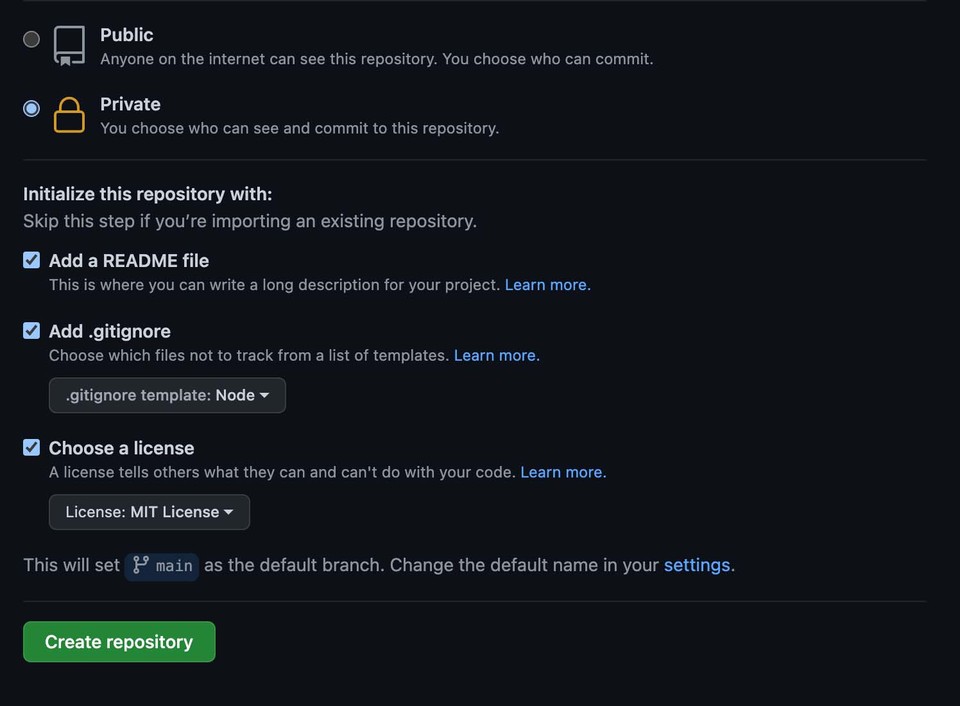
Go ahead and create your first repository, and make sure it's set to private. Add a ReadMe file, a .gitignore (select "node" as the type) as well as license. If you're not sure what license to choose, Github has created a site dedicated to helping you choose called choosealicense.com.
Netlify
Next you'll want to open your account in Netlify. Head on over to Netlify.com and click "get started for free" to sign up for a free account. Sure, there are plenty of paid features, but you won't need any of them for our blog.
Once your account is set up, go ahead and close it. We'll be back later to create a new site, link it to our Github repo, and configure the "build settings" to make sure continuous deployment is working properly.
But for now, we need to get everything else up and running first.
Setting up your IDE
You can use whichever IDE you'd like to, but I recommend using VScode. I've used others in the past like Atom or Sublime, and I resisted migrating to VScode initially but once I did I never looked back. It's excellent. If you've never used it before, this is a good project to kick the tires.
Node, NPM and Git
We need to setup Node Package Manager (NPM) to work with Gatsby, and install Git to be able to push content up to our Github repository. Open a terminal in VScode (Terminal/New Terminal) and check to see if Node, NPM and Git are already installed:
# confirm node is installednode --version
# confirm npm is installednpm --version
# confirm git is installedgit --versionIf one or both are not installed, download and install the appropriate versions for your OS:
Download and install Node.js
Download and install the version that's "Recommended For Most Users" of Node.js. The version with the "Latest Features" isn't the most stable version to work with.
Install NPM (Node Package Manager)
To install NPM, Node needs to be installed first. Once Node is installed, open a terminal in VScode and run the following command:
npm install -g npmDownload and install Git
Download and install the "Latest source Release" for Git.
Time to start building our blog
Download a clone of our Github repository
Once Node, NPM and Git are installed, it's time to use "git clone" to pull down a copy of the repository we made to your desktop.
In your VScode terminal enter:
git clone https://github.com/<enter your github username here>/<enter your github repo name here>.git
# for example:# git clone https://github.com/myGitHubUsername/my-github-repository-name.gitOnce the repository has been cloned to the desktop, back in the terminal navigate to the cloned directory:
cd ~/Desktop/<name-of-cloned-repository>Migrate starter theme content
Time to migrate the starter theme content into the folder on our desktop that's linked to our git repository for the blog.
To do this, we can use the finder in our OS's GUI to get this part done. While you could perform the following steps using commands in your terminal, you certainly don't have to. Open and view the contents of the directory containing the starter theme.
Select the contents of the theme folder, and copy them into the Github repository folder we cloned to your desktop. If you get an error regarding the "Readme.md" or "License" files, just go ahead and overwrite what was in our github repository folder.
Let's head back over to VScode, and open the repository folder on the desktop in the file explorer (File > Open Folder).
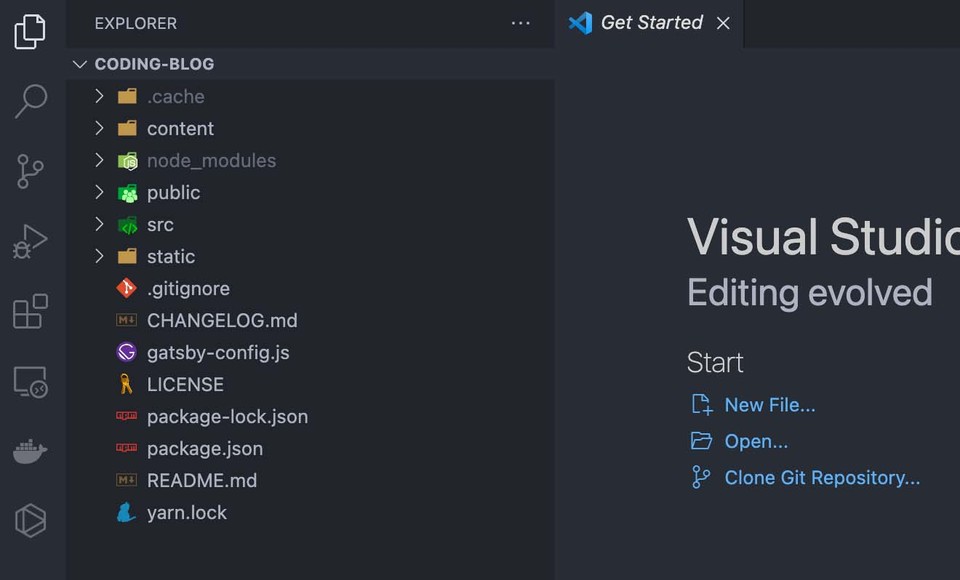
Now you can see all of the contents of our starter theme from inside of the file explorer located on the left hand side of the screen of VScode.
Install Gatsby
Time to head back to the terminal in VScode. From the terminal, we're going to use npm to install Gatsby. Make sure your located inside of the cloned folder for our repository on your desktop and run the following command:
npm install -g gatsby-cliConfirm that it's been installed:
gatsby --versionBefore we can run any Gatsby commands, we need to run "npm install" to install the dependencies included in our starter theme.
npm installOnce the install is complete the local development version of our starter theme is ready to roll.
Gatsby commands
Here are the only commands you'll need to interact with your Gatsby site from this point forward:
gatsby developThis will create a "development build" that you can view live in a local browser. Once the command is completed you will be provided with a local url to view your site. Typically it's localhost:8000. Copy and paste this into a browser to view the locally hosted development version of your new site.
http://localhost:8000/While gatsby develop is running, every time you edit your site's code you should see it update live in the browser. If not, you need to re-run the gatsby development command to view the updated content in a live preview using the same url listed above.
If your updates still aren't appearing in the browser make sure you empty your browser cache, and run the gatsby develop command again.
Once your edits are complete, you can now use the following command to create what's called a "production build" of your site which is a version ready for hosting:
gatsby buildIMPORTANT ... prior to pushing your content to your Github repository for hosting I highly recommend you view a live preview of this build locally first using:
gatsby serveThis will produce a locally hosted live preview of your production build typically at localhost:9000.
http://localhost:9000/I consider this to be such an important part of my work flow that I run these two commands one right after the other by using the following:
gatsby build && gatsby serveOnce you confirmed that your production build is ready for deployment it's time to start setting up our continuous deployment (CD) pipeline.
Setting up the CD pipeline
Git
Let's make sure our version control is up and running by issuing a "git status" command:
git status
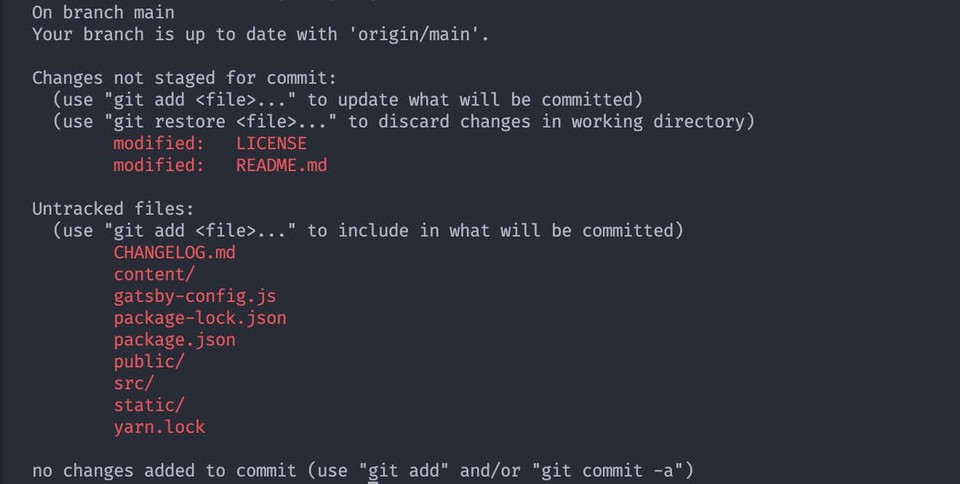
You should see a long list of file names in red. For those of you who are not familiar with Git, this is completely normal and expected. The files listed in red are either new, "modified" or "untracked" files inside of our git repository folder. Any time you edit a file in this folder it will appear in this list of red file names when you run a git status command.
If you get something other than the output I described, than it's time to double check that you're inside of the folder we cloned from Github and re-run the git status command.
Let's get ready to make our first "git commit" and "git push" to send a copy of the updated code to our git repository.
If you're not still there already, in a terminal in VScode, navigate to the cloned Github repository directory on your desktop.
Run the following commands in order:
git statusAll of the new, modified or untracked files are still listed in red.

git add *The git add command with the "*" wildcard adds all the new or modified files listed in red to be included in our git commit.

NOTE: You will probably see a message that says, "The following paths are ignored by one of your .gitignore files: node_modules". This is a good thing. You definitely do not want to send all of the node_modules up to your repository (nor is it necessary). Do not manually add this to your .gitignore file.
Let's run the git status command again to confirm that the new or modified files that were listed in red have been added.
git statusAll the red file names in the previous output should be listed in green now, and if you notice the list of new files has grown since we first ran the git status command.
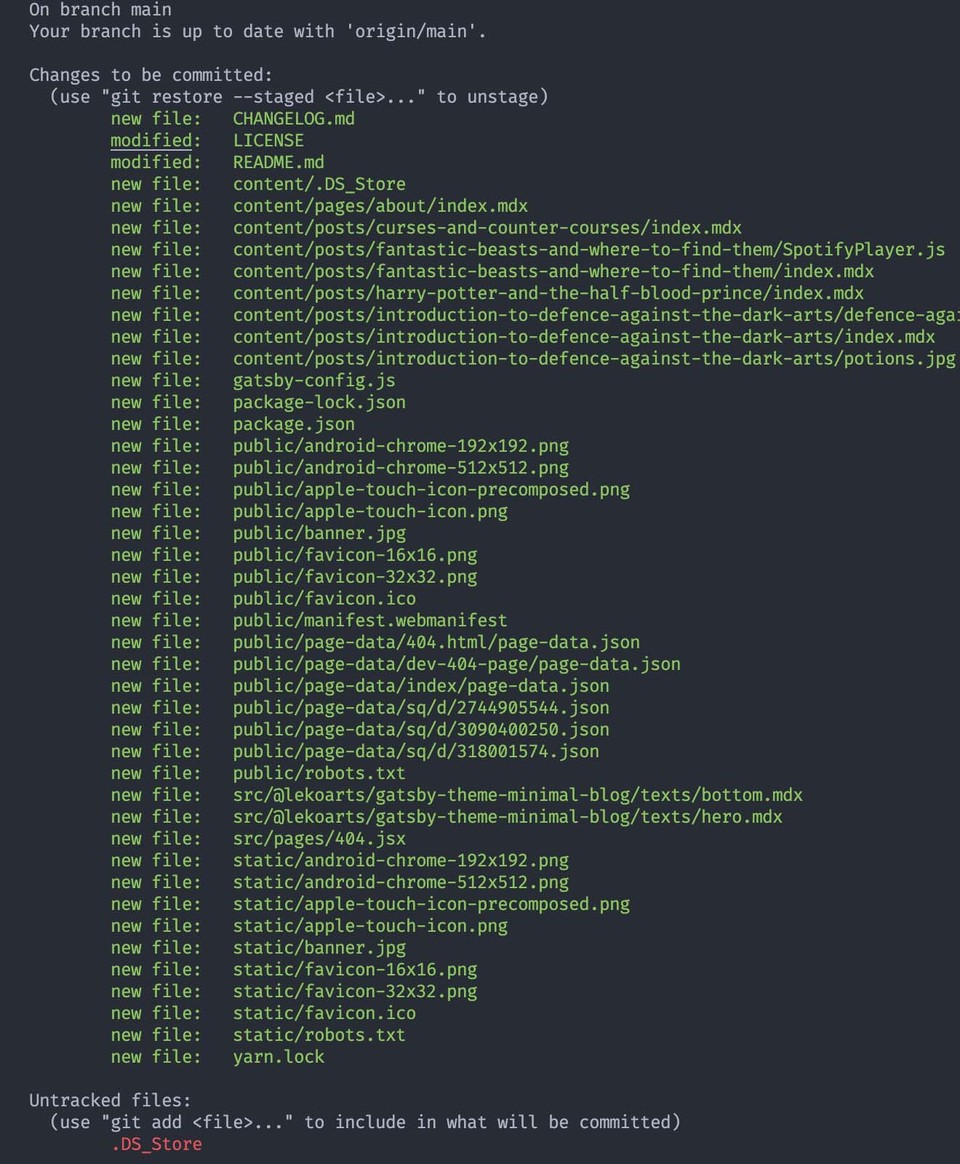
Now you're ready to make your first "git commit".
git commit -am "My first commit"You'll see the following output that shows all of the staged items included in the commit we just performed.
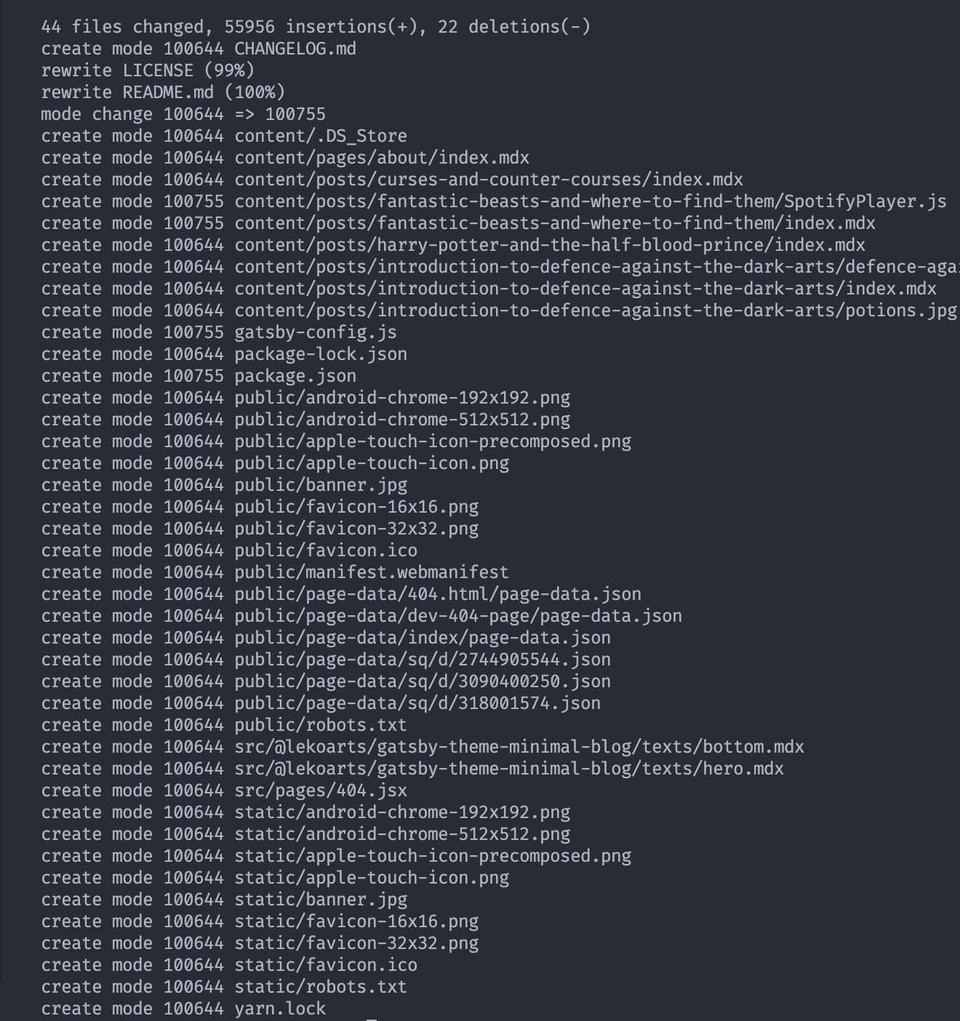
Once that command finishes we need to run "git push" to upload content to your remote repository.
git pushYou should see your content being "pushed" or uploaded into your remote repository on github.

I like to run another git status command just to confirm that the local repository, and the repository on Github are both up to date.
git statusYou should see the following output that states "Your branch is up to date with 'origin/main'".

Your site is READY for deployment. Next stop, Netlify.
Netlify
It's time to set up our CD pipeline by linking our Netlify site to our Github repository that will contain our blog's source code. Head on over to Netlify and click on "Sites". Next click on the "New site from Git" button.

From here we're presented with options to link our site to Github, GitLab or BitBucket. In our case, we'll be linking it to the Github repository that contains our source code.
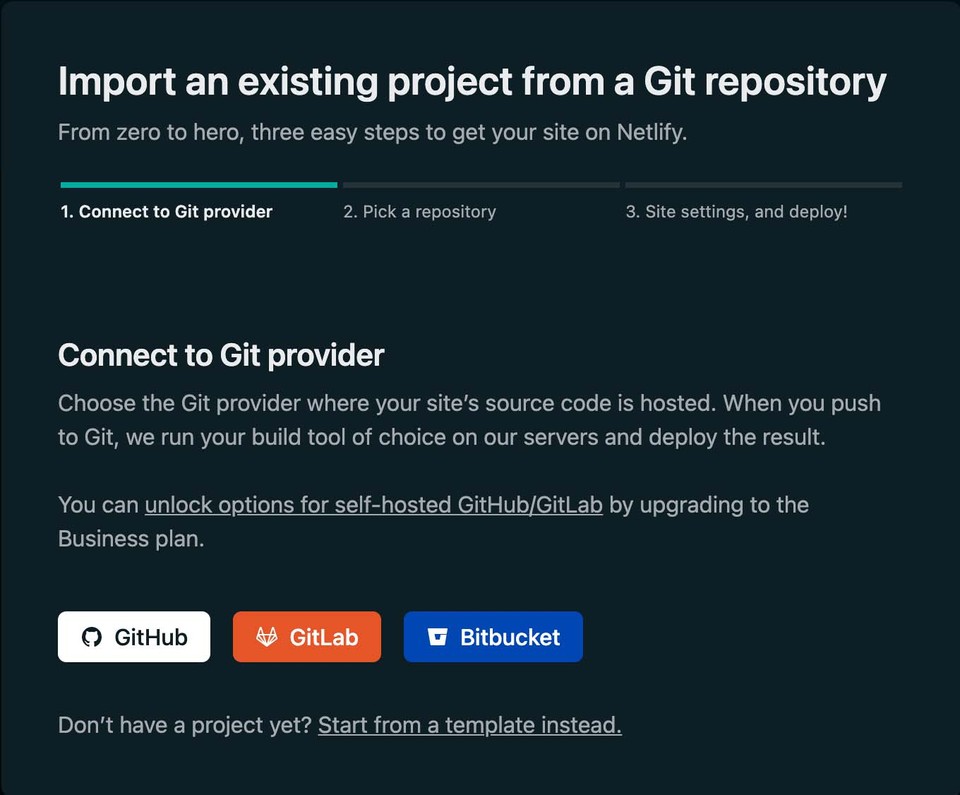
Right after selecting Github we're presented with a login screen for our Github credentials. This is expected and it's a necessary part of the process for continuous deployment to work. If at any time in the future you choose to stop working with Netlify, you can revoke their access from the security controls within your Github account.
Next we'll need to select the Github repository we want Netlify to link to. Enter the name of the repository in the provided search field and click "continue", and select the correct repository for your blog.
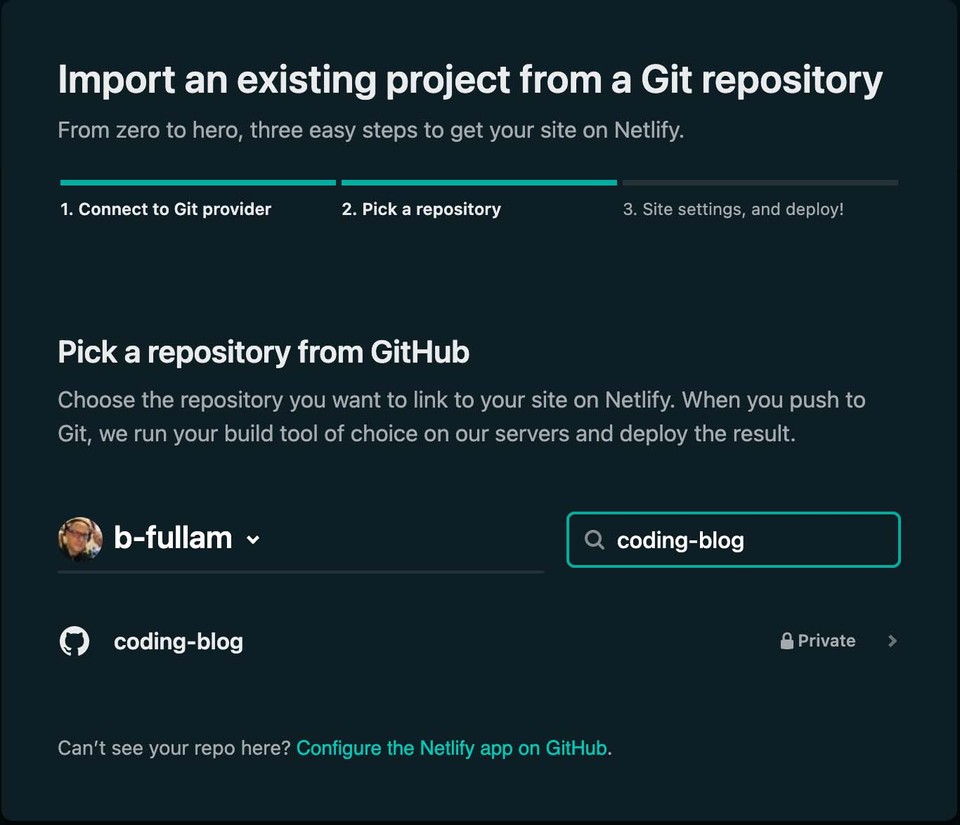
We're now presented with "Site settings" which allow "more control over how Netlify builds and deploys your site". You shouldn't need to change the name of the "owner" or "branch to deploy" fields. However, further down the page under "Basic build settings" you need to update the "build command" field with the following command:
gatsby build
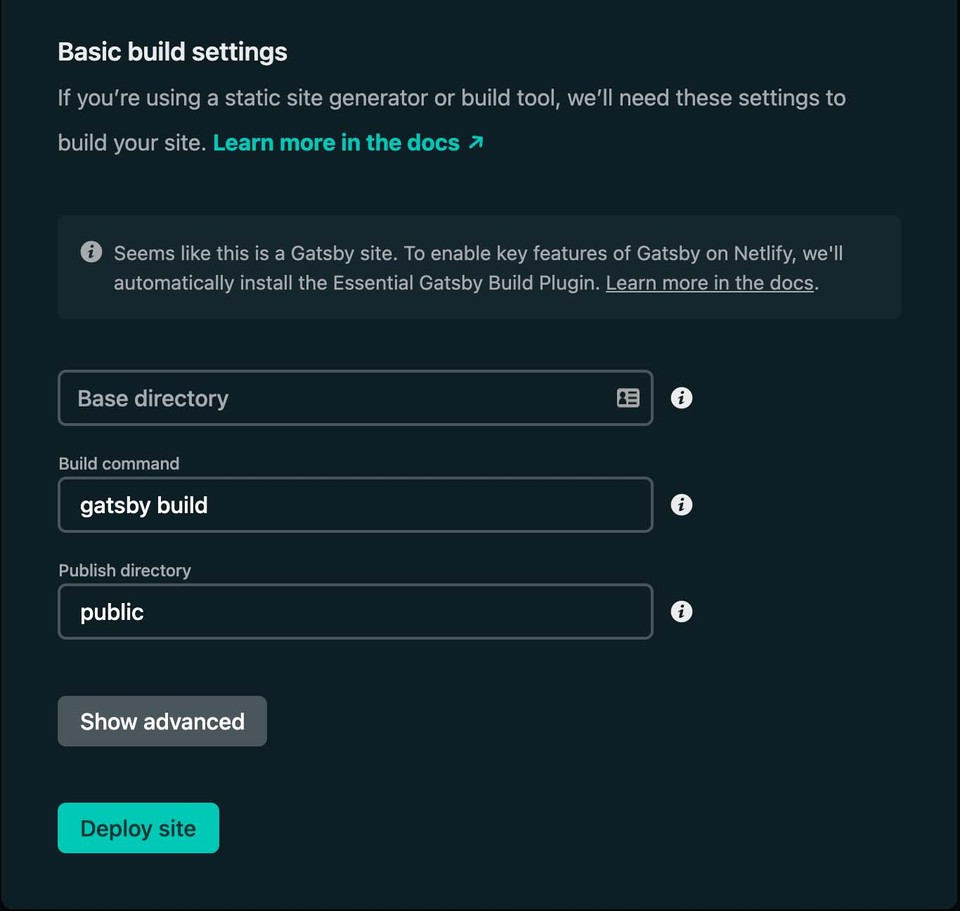
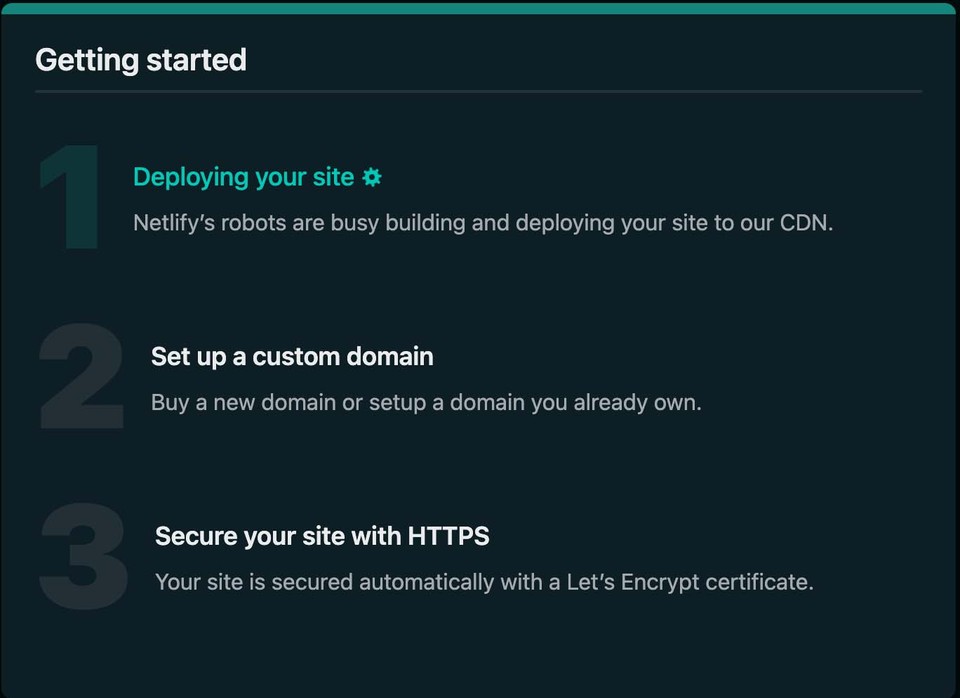
Once that's done, go head and click the "Deploy site" button. Netlify will close the dialogue box and take you back to your site's settings page where you can see a "Getting started" list. At the top, "Deploying your site" is the first item and you should see some animated icon indicating that a "build" is in progress.
Once the build is completed, a check mark indicating the successful build can be seen next to "Your site is deployed". At this point you can use the link listed above the "site settings" and "deploy settings" buttons to view the live version of your blog.
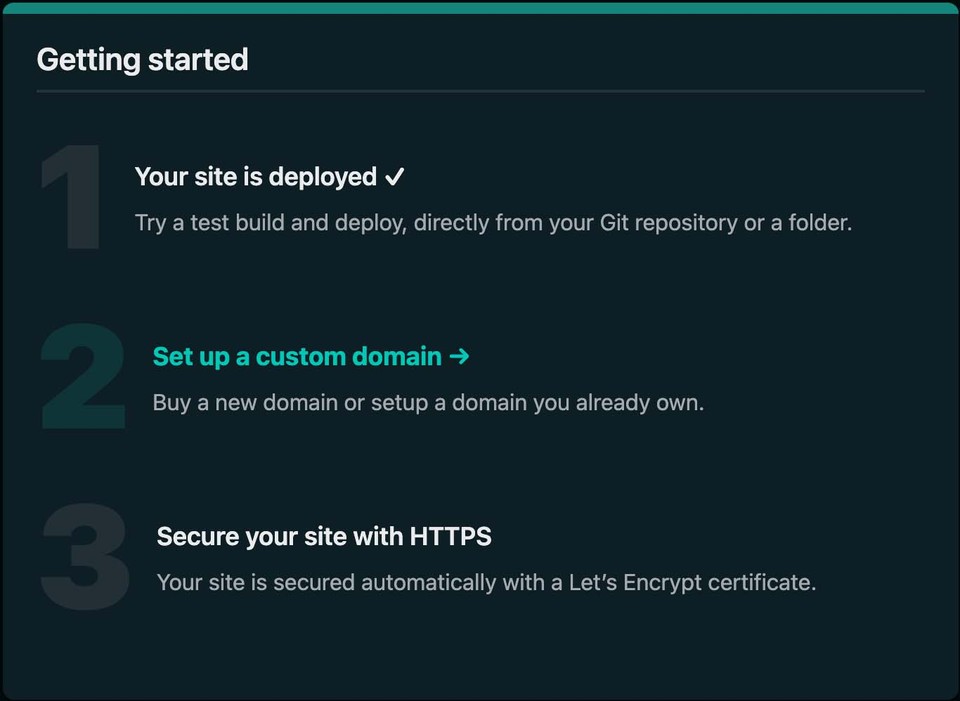
Now, steps 2 and 3 listed below "Your site is deployed" are for setting up a custom domain. For those of you who want to do this, then these are your next stops AFTER we run a test to trigger another continuous deployment build.
Let's head back to VScode and make some changes to our site content for our test.
Let's test our new CD workflow
Our blog site is live, and Netlify is watching our Github repository for an update. Time to make some simple, but obvious changes to our site so we can confirm that our continuous delivery pipeline is working properly.
Go back to VScode and choose any visible text on your blogs homepage. For example, in my starter theme there's some text in the hero section of my blog. I'm going to make a simple change and then work through the following command to build and view the edit locally:
gatsby developOpen the localhost:8000 url to view the edit in our locally hosted version. If everything looks good, then let's go ahead and run our next commands:
gatsby build && gatsby serveGatsby build creates our "production version" of our updated site, and Gatsby serve let's us view a locally hosted version of it.
Open the localhost:9000 url to view the edit in our locally hosted version. If everything looks good, then it's time to make our second commit and push our updated site content to Github and trigger our automatic build and deployment of the updated content on Netlify.
Run these commands in order:
git statusRemember we'll see a list of red files that have been modified.
git add *You will see a message that says, "The following paths are ignored by one of your .gitignore files: node_modules".
git statusOur modified files that were listed in red will now appear green, and it's time to run git commit.
git commit -am "my second commit and test of continuous deployment"After the modified files are staged by the commit all that's left is to run git push to update our remote github repository which should trigger an automatic site update on Netlify.
git pushAt this point, you can head back over to Netlify and you should be able to see the new build already in progress (if it's not already done).
BOOM. The magic of continuous deployment.
Make sure you clear your web browser's cache, and navigate to the url of your live site. If the build was successful your updated site content should already be visible.
It's that simple.